2011
11.07

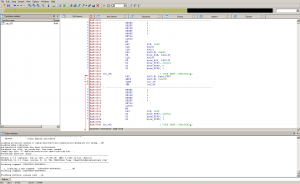
Earlier this week I started to work on reverse engineering code running on the Gamecube DSP, which is as far as I know a custom made CPU optimized for sound processing (mixing several sounds, decoding compressed sample formats, that kind of stuff). The Dolphin emulator has an implementation of a JIT and an interpreter for this CPU, as well as a basic disassembler and assembler used for debugging. But reverse engineering a program made of 4000 instructions using a basic disassembler which outputs a text file is really… primitive compared to the features provided by modern tools like IDA. I’ve wanted to learn more about how to write IDA plugins for a long time, so I started to work on a processor module to handle the GC/Wii DSP in IDA. I’m going to talk about how an IDA processor module is written, and some thoughts I had when writing this module (warning: rant incoming).

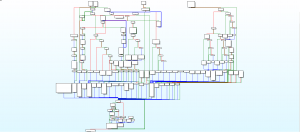
Result of my work on gcdsp-ida

First of all, the complete code of this module can be found on my Bitbucket account. It is written for IDA 6.1 with IDAPython and Python 2.7. For those who don’t know about it, IDAPython is a plugin for IDA which allows IDA scripting in Python using (almost) the same API as normal C modules. Some modules distributed with IDA 6.1 are programmed like that: for example, spu.py (for Sony’s PS3 SPU cores) and msp430.py (for TI MSP430 CPU) so it’s easy to go look at the code in these modules if you have a problem.

A Python processor module needs to export a function called PROCESSOR_ENTRY, which returns an instance of a subclass of idaapi.processor_t, the base class of processor module objects. The object needs to define some properties, for example a bitfield of features needed or supported by the plugin, the CPU name, all of the CPU instructions and registers, as well as the number of bits in a byte and all kind of properties like that. Four functions must also be supported:

  • ana, which stands for analyze, reads bytes at a given address and decodes them to get an instruction. The method needs to fill the cmd_t object named self.cmd and return the number of bytes read.
  • out and outop handle outputting respectively an instruction and an instruction operand. They are called after ana, with self.cmd initialized to what you set it before.
  • emu emulates the behavior of an instruction to create cross-references and code flow edges. For example, a RET instruction needs to stop the current basic block, and a CALL instruction will have a reference to another function.

That’s all you need to implement for an IDA processor module. Obviously it is not that easy, you still need to decode the ISA of your CPU and handle operands correctly, etc. There is not a lot more to tell about this so let’s talk about what I think of the IDA API now that I manipulated it a bit.

It’s crap. It kind of works, but has almost no documentation, really few examples and even the documentation can be quite misleading when you start using non conventional features. For example, to specify that your CPU manipulates big endian data, you need to guess that you have to implement notify_init and set cvar.inf.mf to True. By the way, mf means MSB First… calling the field be or big_endian would probably make too much sense. But wait, even setting mf to True is not always enough! When your CPU uses bytes with more than 8 bits (the GC DSP uses 16 bits in a byte), you also need to set cvar.inf.wide_high_byte_first to True. Note that for two fields that do almost the same thing, the two names are completely different.

Talking about names:

  • ua_add_cref
  • out_tagon
  • OutLong

These three functions are all from the IDA API. Not inconsistent enough? Let’s look at the constant names: o_void, fl_F, CF_CALL. I don’t think I have to rant more about this, it’s simply stupid and you always have to look up in the C++ header files (not the documentation, it doesn’t exist) to check how a function is written.

Some things in the IDA API clearly have been written for the x86 CPU and can’t be easily generalized for other CPUs. For example, each CPU module need to define a code segment register and a data segment register, even when segmentation makes no sense at all. I looked at the SPU and the MSP430 plugins and both of those define fake registers just to please IDA and to make it think that there is a data and code segment. Another problem like that is when your CPU has bytes with more than 8 bits. The API is completely inconsistant about when a byte means 8 bits or when a byte means the native byte of your CPU. For example, the get_full_byte function reads a native byte from your CPU, but the ua_next_byte returns an 8 bit byte. Both use the same terminology and you can’t guess what is the right one to use without trying.

I also encountered some very strange bugs when coding this plugin. For example, each cmd_t object you initialize with your ana function has a specval field you can use to store custom values in it for the emu and out functions, but it was always set to 0 in ana and emu even after setting some bits in it.

Conclusion on this experience: the IDA processor module API works quite well but has evolved without any real design decisions, leading to a big clusterfuck of randomly named functions and words that don’t mean the same thing in all occasions. I spent more time fighting with the API than coding the disassembler, and I think this is quite a problem.

2011
10.18

Non french readers: sorry for the lack of translation, this is about talks in french organized at my school 🙂

Le laboratoire système et sécurité d’EPITA organise mercredi 26 octobre de 20h30 à 22h en amphi 2 une session de lightning talks exposant des sujets divers relatifs aux problématiques du laboratoire, le tout en 10 à 15 minutes par présentation.

6 sujets seront présentés lors de cette session :

  • Le SMP sur x86 (Xavier Deguillard, LSE 2012)
  • PCAP et capture de traffic réseau (Gabriel Laskar, LSE 2012)
  • TLS, comment ça marche ? (Stephane Sezer, LSE 2012)
  • Merkle Trees et vérification d’integrité (Pierre Bourdon, LSE 2013)
  • Techniques d’anti-debugging sous Win32 (Samuel Chevet, LSE 2013)
  • L’allocateur SLAB (Xavier Deguillard, LSE 2012)

Adresse : 14-16 rue Voltaire, 94276 Le Kremlin-Bicêtre.

Venez nombreux !

2011
06.10

Part 1 of this article talked about how I found the bytecode files and the interpreter assembly code. Let's go further and try to understand how these bytecode files are structured.

We now have 188MB of JSON describing the CPU state when an instruction tries to access either the bytecode file in memory or the interpreter state. However, it is not readable at all:


{'type':'r', 'size':4, 'addr':'016E1964', 'val': '00007D40', 'pc':'80091DB8'
{'type':'r', 'size':4, 'addr':'016E00F4', 'val': '11000000', 'pc':'80091DBC'
{'type':'w', 'size':4, 'addr':'016E1964', 'val': '00007D44', 'pc':'80091DC8'
{'type':'r', 'size':4, 'addr':'016E0544', 'val': '00000000', 'pc':'80092720'
{'type':'r', 'size':4, 'addr':'016E053C', 'val': '816D83B4', 'pc':'80092724'
{'type':'r', 'size':4, 'addr':'016E1964', 'val': '00007D44', 'pc':'80092730'
{'type':'r', 'size':4, 'addr':'016E00F8', 'val': '00000000', 'pc':'80092734'
{'type':'w', 'size':4, 'addr':'016E1964', 'val': '00007D48', 'pc':'8009273C'

We need to enhance this by using the informations we already have on the interpreter behavior (where PC is stored, where is the instruction dispatcher, etc.). I wrote a very simple script called filter.py, which iterates on each line, loads the JSON object as a Python dict, applies a list of filters to it and prints the filtered line. Here is an example of a filter which detects lines in the dump from the instruction dispatcher:

(lambda d: d['pc'] == '80091DBC',
 'ReadInstr: %(val)s at pc=%(r3)s (@ %(pc)s)',
 'blue'),

It's a tuple with a predicate function, a format string which will be formatted using the JSON object itself, and a color which is translated to the equivalent ANSI color code (for blue, it is \e[34m). We can also write filters for instructions trying to access the script bytecode, and instructions manipulating the Program Counter (PC):

(lambda d: (int(d['addr'], 16) - 0x016E1964) % 5152 == 0
           and int(d['addr'], 16) >= 0x016E195C
           and d['type'] == 'r',
 '  GetPC: %(val)s at addr=%(addr)s (@ %(pc)s)',
 'green'),
(lambda d: (int(d['addr'], 16) - 0x016E1964) % 5152 == 0
           and int(d['addr'], 16) >= 0x016E195C
           and d['type'] == 'w',
 '  SetPC: %(val)s at addr=%(addr)s (@ %(pc)s)',
 'red'),

(lambda d: 0 <= int(d['off'], 16) < 0x8191,
 'SoAccess: type=%(type)s val=%(val)s at off=%(off)s (@ %(pc)s)',
 'yellow'),

Now that we know where the PC is stored, a first step would we to locate the control flow handling instructions. I took all of the ReadInstr lines from the dump and analyzed the PC value to see which instruction was doing jumps, i.e. after which instruction is the PC at least 0x10 more or less than its previous value. I won't paste the script here (it's easy to code but a bit long), but it was of a great use, finding only four instructions modifying the control flow. Opcodes starting by 05, 06, 08 and 09 all modified at least at one time in the dump the value of PC. Looking at the dump, 05 and 06 seems to do a lot of stuff, storing and loading from addresses we don't know about yet, but analyzing the PC after and before those opcodes, we can determine easily enough that they are the usual CALL/RET instructions. For example:

Opcode 05 at 7D48, jumping to 742C
  Opcode 05 at 7434, jumping to 6FA0
    Opcode 05 at 6FB8, jumping to 6D8C
    Opcode 06 at 6D88, jumping to 6FC0
  Opcode 06 at 6F9C, jumping to 743C

See how the jump address from opcode 06 are always just after an opcode 05? Looking at the dump a bit closer, we can also see that op05 writes its next instruction PC somewhere in the interpreter state (let's now call this somewhere "the stack"), and op06 reads it from exactly the same place! Let's look at opcode 08 now in the memory accesses dump:

ReadInstr: 08000000 at pc=00006E24 (@ 80091DBC)
  SetPC: 00006E28 at addr=016E1964 (@ 80091DC8)
{'type':'r', 'size':4, 'addr':'016E0544', 'val': '00000000', 'pc':'800923EC'
{'type':'r', 'size':4, 'addr':'016E053C', 'val': '816D83B4', 'pc':'800923F0'
  GetPC: 00006E28 at addr=016E1964 (@ 800923FC)
SoAccess: type=r val=00006D80 at off=00006E48 (@ 80092400)
  SetPC: 00006E2C at addr=016E1964 (@ 80092408)
{'type':'r', 'size':4, 'addr':'016E0544', 'val': '00000000', 'pc':'8009240C'
  SetPC: 00006D80 at addr=016E1964 (@ 80092418)

So... it reads instruction 8, adds 4 to the PC, reads a word from the bytecode, adds 4 to the PC, then sets the PC to the word read in the bytecode. In other words, after executing 08000000 12345678, PC=12345678. That's an absolute jump, which seems unconditional: every time an opcode 08 is encountered in the dump, PC is modified. That means opcode 09 is most likely a conditional jump: they are almost always used to implement loops and if statements. Two parts of the dump related to opcode 09 seems to confirm that:

ReadInstr: 09000000 at pc=00000500 (@ 80091DBC)
  SetPC: 00000504 at addr=016E1964 (@ 80091DC8)
{'type':'r', 'size':4, 'addr':'016E0544', 'val': '00000000', 'pc':'80092420'
{'type':'r', 'size':4, 'addr':'016E053C', 'val': '816D83B4', 'pc':'80092424'
  GetPC: 00000504 at addr=016E1964 (@ 80092430)
SoAccess: type=r val=00000564 at off=00000524 (@ 80092434)
  SetPC: 00000508 at addr=016E1964 (@ 8009243C)
{'type':'r', 'size':4, 'addr':'016E0544', 'val': '00000000', 'pc':'80092440'
{'type':'r', 'size':4, 'addr':'016E115C', 'val': '00000000', 'pc':'8009244C'
{'type':'r', 'size':4, 'addr':'016E055C', 'val': '00000000', 'pc':'80092458'
  SetPC: 00000564 at addr=016E1964 (@ 80092464)
{'type':'r', 'size':1, 'addr':'016E0558', 'val': '00000000', 'pc':'80091CFC'
{'type':'r', 'size':4, 'addr':'016E0544', 'val': '00000000', 'pc':'80091D38'
{'type':'r', 'size':4, 'addr':'016E1970', 'val': '00000011', 'pc':'80091D44'
{'type':'r', 'size':4, 'addr':'016E0544', 'val': '00000000', 'pc':'80091D78'
{'type':'r', 'size':4, 'addr':'016E1970', 'val': '00000011', 'pc':'80091D84'
{'type':'r', 'size':4, 'addr':'016E0544', 'val': '00000000', 'pc':'80091DA8'
{'type':'r', 'size':4, 'addr':'016E053C', 'val': '816D83B4', 'pc':'80091DAC'

In this case, we jumped to 0564 with the opcode 09000000 00000564. However, another part of the dump shows us that opcode 09 does not always jump:

ReadInstr: 09000000 at pc=000065A4 (@ 80091DBC)
  SetPC: 000065A8 at addr=016E1964 (@ 80091DC8)
{'type':'r', 'size':4, 'addr':'016E0544', 'val': '00000000', 'pc':'80092420'
{'type':'r', 'size':4, 'addr':'016E053C', 'val': '816D83B4', 'pc':'80092424'
  GetPC: 000065A8 at addr=016E1964 (@ 80092430)
SoAccess: type=r val=000065EC at off=000065C8 (@ 80092434)
  SetPC: 000065AC at addr=016E1964 (@ 8009243C)
{'type':'r', 'size':4, 'addr':'016E0544', 'val': '00000000', 'pc':'80092440'
{'type':'r', 'size':4, 'addr':'016E115C', 'val': '00000000', 'pc':'8009244C'
{'type':'r', 'size':4, 'addr':'016E055C', 'val': '00000001', 'pc':'80092458'
{'type':'r', 'size':1, 'addr':'016E0558', 'val': '00000000', 'pc':'80091CFC'
{'type':'r', 'size':4, 'addr':'016E0544', 'val': '00000000', 'pc':'80091D38'
{'type':'r', 'size':4, 'addr':'016E1970', 'val': '00000011', 'pc':'80091D44'
{'type':'r', 'size':4, 'addr':'016E0544', 'val': '00000000', 'pc':'80091D78'
{'type':'r', 'size':4, 'addr':'016E1970', 'val': '00000011', 'pc':'80091D84'
{'type':'r', 'size':4, 'addr':'016E0544', 'val': '00000000', 'pc':'80091DA8'
{'type':'r', 'size':4, 'addr':'016E053C', 'val': '816D83B4', 'pc':'80091DAC'

See the missing SetPC? We can safely assume we know most of the behavior of the four control flow handling instructions: 05=CALL, 06=RET, 07=JUMP and 08=CJUMP. But now, we also know that there is some kind of stack used for CALL/RET. Let's add some new filters to our script in order to detect easily instructions manipulating this stack:

(lambda d: (int(d['addr'], 16) - 0x016E1160) % 5152 == 0
           and int(d['addr'], 16) >= (0x016E195C - 5152)
           and d['type'] == 'r',
 '  GetStackAddr: %(val)s at addr=%(addr)s (@ %(pc)s)',
 'green'),
(lambda d: (int(d['addr'], 16) - 0x016E1160) % 5152 == 0
           and int(d['addr'], 16) >= (0x016E195C - 5152)
           and d['type'] == 'w',
 '  SetStackAddr: %(val)s at addr=%(addr)s (@ %(pc)s)',
 'red'),

(lambda d: (int(d['addr'], 16) - 0x016E1968) % 5152 == 0
           and int(d['addr'], 16) >= 0x016E195C
           and d['type'] == 'r',
 '  GetStackTop: %(val)s at addr=%(addr)s (@ %(pc)s)',
 'green'),
(lambda d: (int(d['addr'], 16) - 0x016E1968) % 5152 == 0
           and int(d['addr'], 16) >= 0x016E195C
           and d['type'] == 'w',
 '  SetStackTop: %(val)s at addr=%(addr)s (@ %(pc)s)',
 'red'),

(lambda d: (int(d['addr'], 16) - 0x016E1164) % 5152 <= 0x800
           and int(d['addr'], 16) >= (0x016E1164)
           and d['type'] == 'r',
 '  GetStack: %(val)s at stack off %(soff)s (addr=%(addr)s @ %(pc)s)',
 'yellow'),
(lambda d: (int(d['addr'], 16) - 0x016E1164) % 5152 <= 0x800
           and int(d['addr'], 16) >= (0x016E1164)
           and d['type'] == 'w',
 '  SetStack: %(val)s at stack off %(soff)s (addr=%(addr)s @ %(pc)s)',
 'cyan'),

Let's re-run our filtering script on the dump and find instructions that access the stack! Opcode 11 seems to be quite small and modifies the stack top, let's look at it more closely:

ReadInstr: 11000000 at pc=0000000C (@ 80091DBC)
  SetPC: 00000010 at addr=016E2D84 (@ 80091DC8)
{'type':'r', 'size':4, 'addr':'016E0544', 'val': '00000001', 'pc':'80092720'
{'type':'r', 'size':4, 'addr':'016E053C', 'val': '816D83B4', 'pc':'80092724'
  GetPC: 00000010 at addr=016E2D84 (@ 80092730)
SoAccess: type=r val=00000008 at off=00000030 (@ 80092734)
  SetPC: 00000014 at addr=016E2D84 (@ 8009273C)
{'type':'r', 'size':4, 'addr':'016E0544', 'val': '00000001', 'pc':'80092740'
  GetStackTop: 000007B8 at addr=016E2D88 (@ 8009274C)
{'type':'r', 'size':4, 'addr':'016E0544', 'val': '00000001', 'pc':'80092764'
  GetStackTop: 000007B8 at addr=016E2D88 (@ 80092770)
  SetStackTop: 000007B0 at addr=016E2D88 (@ 80092778)

ReadInstr: 11000000 at pc=00000158 (@ 80091DBC)
  SetPC: 0000015C at addr=016E1964 (@ 80091DC8)
{'type':'r', 'size':4, 'addr':'016E0544', 'val': '00000000', 'pc':'80092720'
{'type':'r', 'size':4, 'addr':'016E053C', 'val': '816D83B4', 'pc':'80092724'
  GetPC: 0000015C at addr=016E1964 (@ 80092730)
SoAccess: type=r val=00000000 at off=0000017C (@ 80092734)
  SetPC: 00000160 at addr=016E1964 (@ 8009273C)
{'type':'r', 'size':4, 'addr':'016E0544', 'val': '00000000', 'pc':'80092740'
  GetStackTop: 00000794 at addr=016E1968 (@ 8009274C)
{'type':'r', 'size':4, 'addr':'016E0544', 'val': '00000000', 'pc':'80092764'
  GetStackTop: 00000794 at addr=016E1968 (@ 80092770)
  SetStackTop: 00000794 at addr=016E1968 (@ 80092778)

Opcode 11 seems to read an argument just after the bytecode in the file and substracts it from the stack top. For example, 11000000 00000010 removes 0x10 from the stack top. Most of the time this is done to reserve space for local variables (for example, on x86 you do sub esp, 0x10), so let's call this instruction RESERVE. Opcode 10 seems to do almost the same thing but adds to the stack top instead of substracting, so let's call it UNRESERVE.

Another opcode, 0E, seems to write values to the stack and substracts 4 from the stack top each time it does that. In other terms, it pushes a value to the stack. But where does this value come from?

In the next part of this article, I'll talk about the scratchpad, where the temporary variables are stored for computations, and how variables are represented in this interpreter. Stay tuned!

2011
06.10

Reading Wii discs with Python

This big article is a translation of the three part article I wrote in January called "Lire des disques de Wii en Python" (part 1 / part 2 / part 3). Thanks a lot to Kalenz for helping me translate it!

What I mean by reading a Wii disc is simple: from a Wii DVD image, being able to get metadata about the game, like its name or its unique ID, but also being able to read the filesystem on the disc to access the game executable and data. We'll do this in three parts: first, we'll decrypt the disc clusters to be able to access the raw partition data, then we'll parse the filesystem to access files and directories, and we'll end this by a presentation of wiiodfs, the software I created to mount Wii discs on Linux using FUSE.

I currently only have one game disc image on my computer: the one from Tales of Symphonia: Dawn of the New World, PAL version, whose ID is RT4PAF (sha1sum: b2fb05a7fdf172ea61b5d1872e6b121140c95822). I'm going to work on this disc image for my tests, and if needed fix things when I'll have to open another game DVD image which doesn't work. To write this article, I'm using documentation from WiiBrew, a wiki about Wii homebrew with a lot of technical informations, and the source code of Dolphin, the Wii emulator (mostly in the Source/Core/DiscIO directory). Thanks a lot to all of the contributors to these projects.

All of the examples from this article are given in the form of Python shell transcripts. If you only want a working version of the software to use at home, look at the third part of this article, where I'm talking about wiiodfs.

Reading raw data from a partition

Some facts about Wii discs: they start with a simple header containing metadata about the game (name, ID, disc number, disc type, etc.), placed at offset 0. At offset 0x40000 is the volume group table, which contains all the partitions on the disc. Wii discs generally contain several partitions: at least one for the game and one containing the system upgrades. Each of these partitions have a type: 0 is a data partition, 1 is a system upgrade partition. We'll only look at the data partition, I'm not interested in the system upgrade files. The data partition starts with another header containing informations needed to decrypt the partition data. All of the data on a Wii disc are encrypted using the AES algorithm, with a 128 bytes key.

Let's start by importing useful modules and opening our disc image:

Python 2.7.1 (r271:86832, Dec 20 2010, 11:54:29) 
[GCC 4.5.1 20101125 (prerelease)] on linux2
Type "help", "copyright", "credits" or "license" for more information.
>>> from collections import namedtuple
>>> from struct import unpack as up
>>> from Crypto.Cipher import AES
>>> fp = open('tos-2.img', 'rb')

We'll read the disc header at offset 0x0 using struct.unpack. It's really easy: the header has a fixed size and fixed size fields.

>>> DiscHeader = namedtuple('DiscHeader',
...     'disc_id game_code region_code maker_code disc_number disc_version '
...     'audio_streaming stream_bufsize wii_magic gc_magic title'
... )
>>> disc_hdr = DiscHeader(*up('>c2sc2sBBBB14xLL64s', fp.read(96)))
>>> disc_hdr
DiscHeader(disc_id='R', game_code='T4', region_code='P', maker_code='AF',
           disc_number=0, disc_version=0, audio_streaming=0,
           stream_bufsize=0, wii_magic=1562156707, gc_magic=0,
           title='Tales of Symphonia: Dawn of the New World' + n*'\x00')

The game metadata are all contained in this header: game ID (RT4PAF, separated into disc_id, game_code, region_code and maker_code), game title (zero terminated), and a magic number, 0x5d1c9ea3, which confirms that this is actually a Wii disc. Next step is the volume group table. Let's see what it looks like using xxd:

$ xxd -s 0x40000 -l 48 tos-2.img
0040000: 0000 0002 0001 0008 0000 0000 0000 0000  ................
0040010: 0000 0000 0000 0000 0000 0000 0000 0000  ................

There are 4 volume groups containing multiple partitions. That means a partition is identified by its VG id and its partition ID. The VG table we just dumped contains for each VG two 32 bytes words: the first one is the number of partitions in that VG, and the second one is the offset to the partition table (the offset is in block of 4 bytes, so we must multiply it by 4 to get an offset in bytes). Here, we have the first VG containing 2 partitions, and its partition table is at offset 0x10008 * 4, which is 0x40020. Let's use xxd again:

$ xxd -s 0x40020 -l 16 tos-2.img
0040020: 0001 4000 0000 0001 03e0 0000 0000 0000  ..@.............

Each entry in this table contains first the offset to the partition (again, in block of 4 bytes), but also the type of the partition. As said above, type 1 = system upgrade partition and type 0 = game data. Here, we have an update partition at offset 0x14000 * 4 and a game data partition at offset 0x3e00000 * 4. Using Python, we can dump all of the VG entries and all of the partitions in an easy to read format:

>>> PartEntry = namedtuple('PartEntry', 'offset type')
>>> def read_part_entry(offset):
...     fp.seek(offset)
...     (data_offset, type) = up('>LL', fp.read(8))
...     data_offset *= 4
...     return PartEntry(data_offset, type)
>>> 
>>> read_part_entry(0x40020)
PartEntry(offset=327680, type=1)
>>> read_part_entry(0x40028)
PartEntry(offset=260046848, type=0)
>>> 
>>> VGEntry = namedtuple('VGEntry', 'part_count table_offset')
>>> def read_vg_entry(offset):
...     fp.seek(offset)
...     (part_count, table_offset) = up('>LL', fp.read(8))
...     table_offset *= 4
...     return VGEntry(part_count, table_offset)
... 
>>> read_vg_entry(0x40000)
VGEntry(part_count=2, table_offset=262176)
>>> read_vg_entry(0x40008)
VGEntry(part_count=0, table_offset=0)
>>> 
>>> def read_part_table():
...     base_off = 0x40000
...     vgs = {}
...     for vg_num in xrange(4):
...         vg_ent = read_vg_entry(base_off + 8 * vg_num)
...         if vg_ent.part_count == 0:
...             continue
...         vgs[vg_num] = {}
...         for part_num in xrange(vg_ent.part_count):
...             off = vg_ent.table_offset + 8 * part_num
...             part = read_part_entry(off)
...             vgs[vg_num][part_num] = part
...     return vgs
... 
>>> read_part_table()
{0: {0: PartEntry(offset=327680, type=1),
     1: PartEntry(offset=260046848, type=0)}}

The game data partition is encrypted using AES in CBC mode with a key stored in the partition header. This key is itself encrypted using a master key, which is the same on every Wii console, and is stored in One Time Programmable memory inside the Wii CPU at manufacturing time. This key has been known for a long time and can be found for example in the Dolphin code. AES CBC needs a key and an IV (Initial Vector) to proceed. The IV is also stored in the partition header: it is part of the title ID which uniquely identifies a game and is for example used to know where a game stores its data on the console NAND. We have all the informations we need to recover the game specific key (aka. title key), let's start by parsing the ticket, which is the data structure containing all the keys and infos we need about a title:

>>> Ticket = namedtuple('Ticket',
...     'enc_tit_key tit_id data_off data_len'
... )
>>> part = read_part_table()[0][1]
>>> fp.seek(part.offset)
>>> ticket = Ticket(*up('>447x16s13x16s204xLL', fp.read(704)))

For a reason I don't know, Nintendo did not use the whole title ID as the IV but only the first 8 bytes. The 8 other bytes are filled with 0. Let's decrypt the title key!

>>> master_key = '\xeb\xe4\x2a\x22\x5e\x85\x93\xe4'
>>> master_key += '\x48\xd9\xc5\x45\x73\x81\xaa\xf7'
>>> 
>>> iv = ticket.tit_id[:8] + '\x00' * 8
>>> 
>>> aes = AES.new(master_key, AES.MODE_CBC, iv)
>>> key = aes.decrypt(ticket.enc_tit_key)
>>> key
'U\x84\xfb\x8b\x10\xdfu=B;\xdcyF\xd4G\x9d'

With that, we are now able to decrypt the partition contents. Data are stored at an offset found in the ticket (data_off in the ticket parsing code above). From that offset, data is organized in clusters of 0x8000 bytes. These clusters contain each 0x400 bytes of hashing informations to validate data integrity, and 0x7C00 bytes of encrypted data. To decrypt the data, we use the title key, and the IV is stored in the first 0x400 bytes of the cluster, at offset 0x3D0:

>>> def read_cluster(idx):
...     data_offset = part.offset + ticket.data_off * 4
...     cluster_offset = data_offset + idx * 0x8000
...     fp.seek(cluster_offset)
...     data_enc = fp.read(0x8000)
...     iv = data_enc[0x3D0:0x3E0]
...     aes = AES.new(key, AES.MODE_CBC, iv)
...     return aes.decrypt(data_enc[0x400:])

Let's test that by decoding the first 20 clusters and looking at their content:

>>> for i in xrange(20):
...     open('/tmp/cluster%d' % i, 'wb').write(read_cluster(i))

$ strings /tmp/cluster* | less
[...]
This Apploader built %s %s for RVL
APPLOADER WARNING >>> Older version of DEVKIT BOOT PROGRAM.
APPLOADER WARNING >>> Use v1.07 or later.
APPLOADER ERROR >>> FSTLength(%d) in BB2 is greater than FSTMaxLength(%d)
APPLOADER ERROR >>> Debug monitor size (%d) should be a multiple of 32
APPLOADER ERROR >>> Simulated memory size (%d) should be a multiple of 32
[...]

Success! Data seems to have been read and decrypted correctly from the partition (if it's working for the first 20 clusters, we can certainly assume that it will work for the rest of the partition). Let's end this part by dumping the entire partition to be able to analyze the filesystem easily later. The partition size is stored in the ticket, let's go!

>>> nclusters = ticket.data_len * 4 / 0x8000
>>> out_fp = open('/path/to/tos-2-dumped.img', 'wb')
>>> for i in xrange(nclusters):
...     print '%f%%' % (i * 100.0 / nclusters)
...     out_fp.write(read_cluster(i))

We now have a tos-2-dumped.img file containing the raw partition data, with the filesystem and the game data on it.

Parsing the filesystem

On the partition we just dumped, there are three main parts to analyze:

  • The apploader, which is a small stub of code identical on each game and distributed in the Nintendo Wii SDK, whose role is to load the game executable in memory
  • The game executable, whose sections are not stored linearly. I won't spend a lot of time on how it is stored, but if I remember correctly each section contains the offset to the next section, and you can easily recreate a DOL executable (the format of most Wii/GC executables) which can be converted to an ELF
  • The filesystem, where all of the images, textures, sounds, musics, 3D models, animation data, scripts, etc. are stored for a game. Nintendo provides an API to access the filesystem so everyone uses the same format. That's what we are going to talk about here

The structure of a Wii filesystem is really simple: it is a fully read only filesystem optimized to avoid seeking (slow on an optical disc) so there are no things to handle like data fragmentation. First of all, all of the metadata are stored in the same place, called the FST (FileSystem Table). These metadata are actually only the name of the file, its size and where it is stored on the disc. We can find the FST by looking at offset 0x424 on the partition, which contains the 4 bytes offset to the FST (which means we need to multiply it by 4 to get an offset in bytes).

A filesystem is hierarchical: it is a tree of directories containing leaves which are the regular files. However, the FST is a linear structure (a table). To represent the hierarchy, a directory descriptor uses its size field to store the index of the first descriptor which is not their child. For example, if the root directory contains only 3 files, its size field will contain the value 4 (descriptor 0 is the root directory, 1/2/3 are the files, so 4 is the first which is not a child of the root directory). A little example in ASCII art:

+---------------------+
| Directory 1         |
|   size = 7          |
+---------------------+
    +---------------------+
    | File 1              |
    |   size = 42         |
    +---------------------+
    +---------------------+
    | Directory 2         |
    |   size = 6          |
    +---------------------+
        +---------------------+
        | File 2              |
        |   size = 1337       |
        +---------------------+
        +---------------------+
        | File 3              |
        |   size = 1234       |
        +---------------------+
        +---------------------+
        | File 4              |
        |   size = 4321       |
        +---------------------+
    +---------------------+
    | File 5              |
    |   size = 101010     |
    +---------------------+

After the last descriptor comes the string table containing all the file names. In a file descriptor, the file name is stored as an offset (in bytes this time... consistency!) from the beginning of this string table. To find the offset to this string table, we can use the fact that the first descriptor size is also the total number of descriptors in the FST. And that's all there is to know about a Wii disc filesystem! Quite simple, isn't it?

Let's start writing a bit of code. First, let's import the modules we need and open the image we dumped at the end of the first part of this article:

Python 2.7.1 (r271:86832, Dec 20 2010, 11:54:29) 
[GCC 4.5.1 20101125 (prerelease)] on linux2
Type "help", "copyright", "credits" or "license" for more information.
>>> from collections import namedtuple
>>> from struct import unpack as up
>>> fp = open('tos-2-dumped.img', 'rb')

Then, let's define a useful function which reads data at a specific offset in the file (basically, seek then read):

>>> def read_at(off, len):
...     fp.seek(off)
...     return fp.read(len)

We're all set! First step, let's get the FST offset and multiply it by 4 to get it in bytes:

>>> fst_off = up('>L', read_at(0x424, 4))[0] * 4

Next, the string table offset. We take the FST offset, reads the size of the first descriptor, multiply it by 0xC which is the size of a descriptor, and adds those two to get the offset we need:

>>> str_off = fst_off + up('>8xL', read_at(fst_off, 0xC))[0] * 0xC

Filenames are stored as zero terminated strings of at most 256 characters. Python has nothing standard to read that in the struct module, we will need a small function which reads 256 bytes and cut at the first \0 encountered:

>>> def read_filename(off):
...     s = read_at(str_off + off, 256)
...     return s[:s.index('\0')]
... 
>>> read_filename(0)
'BATTLE'
>>> read_filename(7)
'BG'
>>> read_filename(10)
'btl000.brres'

Now comes the interesting code: the function which reads a file descriptor and all its children recursively to build the filesystem tree. This is not easy to understand with a single reading of the function, I'll explain it just after:

>>> def read_descr(idx):
...     descr = read_at(fst_off + 12 * idx, 12)
...     (name_off, data_off, size) = up('>LLL', descr)
...     data_off *= 4
...     
...     is_dir = bool(name_off & 0xFF000000)
...     name_off &= ~0xFF000000
...     name = read_filename(name_off) if idx else ''
...     
...     if not is_dir:
...         return idx + 1, name, (data_off, size)
...     else:
...         children = {}
...         idx += 1
...         while idx < size:
...             idx, child_name, child = read_descr(idx)
...             children[child_name] = child
...         return idx, name, children

First, let's identify what this function is returning: three values, the first one if the index of the first descriptor which has not yet been handled (makes the recursion easier), the name of the file or directory described by the descriptor we just read, and finally, depending on the file type (regular or directory), the children or the data offset. How this function does that is actually not that difficult: first, we read the 12 bytes of the descriptor from its index. Then, to check if it is a regular file or a directory, we check if one of the top 8 bits of the name is set: if there is at least one, this is a directory. We then read the name. If it is a regular file, we just end there saying that the first non handled descriptor is the one just after us. If it is a directory, we loop while the non handled offset is smaller than our last child and we insert the parsed descriptor into our children. That's all!

To conclude this part, let's dump all of the files and directories in a local directory on our PC. We just have to walk the tree returned by read_descr(0):

>>> from os.path import exists, join
>>> from os import mkdir
>>> def dump(name, data, where):
...     print 'dumping', name, 'to', where
...     if isinstance(data, dict): # directory
...         path = join(where, name)
...         if not exists(path):
...             mkdir(path)
...         for name, data in data.iteritems():
...             dump(name, data, path)
...     else:
...         print data[0], data[1]
...         data = read_at(data[0], data[1])
...         open(join(where, name), 'wb').write(data)

Here we go! We just extracted all the files and directories from a Wii disc onto our computer with just a Python shell. The last step is to make something usable from all of these informations.

Creating a FUSE filesystem for Wii discs

This last part of the article will talk about how to make a usable filesystem from all of that. Indeed, writing code snippets in a Python shell is far from clean, even though it is useful for hacking around.

The result is named wiiodfs, which stands for Wii Optical Disc FileSystem. It is an application able to mount a Wii disc image on Linux, but also a library that people who need to access Wii discs from their software can use. There is still a bit of work to do on it but 99% of the code is done and working.

The first difference of importance when comparing to the two previous parts is that we can not afford to dump the whole parition in a temporary file or dump all the files in a directory. It's ugly, slow and of little interest. The whole decyphering and data access in wiiodfs is done on the fly, when needed. The library is designed with that need in mind.

wiiodfs has a 4-layer design. The n-th layer can access every lower layers. Here is a detailed explanation of the different layers:

  • Raw access to the disc image, metadata, and to the volume groups table. Quite straightforward: no decyphering, no filesystem support, only what is necessary to read the image from a location to another and to recover informations on the disc partitions.
  • Raw access to decyphered partition data. It is almost certainly the most interesting part therefore I will describe it further later, but to sum up, it reads raw data off the partition, decyphers it and returns it to the user.
  • Access to the partition files with an easy-to-use API: Filesystem.open returns an object behaving like a Python file, on which we can call methods like read or seek. There are also methods to list files in a directory, checking if a file exists, etc.
  • Finally, an interface to use our filesystem with Pyfilesystem, a library which aims to define a common interface for all file systems in order to use them in a uniform way.

As I said before, I think the most interesting part in all of this is the second layer, handling the partition decyphering. Indeed, decrypting blocs of 0x8000 bytes is quite slow and some kind of caching is needed to avoid decrypting the same cluster 20 times in a row. I implemented a simple LRU cache to solve this problem. LRU caches are the most simple caches you can think of: they keep a certain number of values sorted by their last use time. That way, the most recently used values will be kept in the cache, and the least recently used values will slowly be replaced by other values which are more used. There are probably a lot of way to cache clusters more efficiently but this was not the goal of this project, and this LRU cache is enough to get a good throughput.

wiiodfs is distributed with a script named wiiodmount which mounts a Wii disc image on a local filesystem folder. To do this, we simply use a feature of Pyfilesystem, called expose.fuse. It's magic and there is almost nothing to do on my side to handle that.

Wrapping up

I knew almost nothing about the Wii when I started writing this article at the beginning of January 2011. This was a really interesting adventure, and I know now in detail how Nintendo decided to store data on their optical discs (at least on the logical layer, I don't know anything about how Wii discs are physically different from classic DVDs). wiiodfs is almost certainly incomplete and buggy, but it is a really simple implementation of the Wii Filesystem and it is as far as I know the only one able to use FUSE to mount the disc on a local folder.

I hope you liked this article 🙂 Let's end that with links and thanks to the projects and people who helped me:

  • Wiiodfs, Mercurial repository of the project
  • Wiibrew, a great Wiki about Wii homebrew, with a lot of technical informations
  • Dolphin, the best Wii/GC emulator, which is licensed under the GPL license
  • Thanks to kalenz who helped me translate this long article to English
2011
06.09

Most games nowadays avoid hardcoding behavior in the main program code. It makes the development process a lot easier by allowing people with less programming experience than the core engine developers to contribute by writing scripts which defines how conversations happen in the game, how menus work, how cinematic scenes go, etc. Scripts are usually written in a higher level language than the game engine, as they require less performance and must be portable when the game needs to run on different platforms. Easy, common script languages like Lua or Python are often used (for example, CCP uses Python to describe the EVE Online client GUI, and Microsoft uses Lua in Freelancer to describe cinematics), but some companies like to create their own language and their own interpreter to do this job.

I'm a fan of Namco's "Tales of" RPG games. I was given a Wii last december as a gift, and bought "Tales of Symphonia: Dawn of the New World". As a true hacker interested in game development, after finishing the game, I started investigating how this game actually works behind the scenes. After writing software to read the encrypted Wii disc of the game, I analyzed the data contained on the DVD, trying to find what was each file and how the game engine made all of this into a game.

For those who don't know, the Tales RPG often have a system to display optional conversation between the game protagonists, which are not directly tied to the game scenario but sometimes give more precision on characters or on some story points from before the game. Some examples on Youtube. These are known as "skits" and are displayed as the characters 2D portraits talking and being animated on the screen. I thought this was a good starting point to try to understand how the game works, and thus tried to find the files related to these skits on the disc. What I'm exposing in this article is work that took me about 3 to 4 months and ended at the start of April.

First, using Dolphin, the best (and probably the only) Wii emulator, I logged all the disc files being opened using the "file monitor" feature of this emulator. When opening the first skit in the game, the emulator output was:

W[FileMon]:      31 kB Chat/FC01_001.bin
W[FileMon]:       4 kB Chat/e/FC01_001.bin
I[FileMon]:     248 kB Sound/stream/FC01_001.brstm

It was easy enough to understand that Chat/ probably contained graphics elements as well as a description of the character picture animation, and Sound/ contained the voices of the characters. Let's not talk about the sound data (maybe in a next article, but they are basically 4-bit ADPCM encoded sound files) and concentrate ourselves on the Chat/ files.

Both of the .bin files are actually Microsoft Cabinet archives (.cab) which can easily be extracted with cabextract or any program using libmspack. Note that one is at the root of the Chat/ directory, while one is in the Chat/e/ directory. Actually, here are all the FC01_001.bin files:

./e/FC01_001.bin
./g/FC01_001.bin
./f/FC01_001.bin
./s/FC01_001.bin
./i/FC01_001.bin
./FC01_001.bin

If you've played the game, it's easy enough to understand what are these directories. The european version of the game I'm working on have been released in five languages: english, german, french, spanish and italian. Looking at the size of the files (31K for Chat/FC01_001.bin and 4.1K for the language specific ones), we can assume that the non language specific one contains only images while the others contains the subtitles for example. Let's extract these .cab files!

In the non language specific one:

-rw-r--r-- 1 119K Aug 28  2008 ar.dat

In the english one:

-rw-r--r-- 1 33K Aug 15  2009 FC01_001.so

Both of these files seem to be in an unknown format. ar.dat does not even have a magic number in its header, but FC01_001.so starts with "TSS\0" which nobody seems to have heard of on the internet. There are a few strings in the .so file: subtitles, as expected, but also things like restTime (%f) or TCP balloon(%d). Not looking too good so far! That's when static analysis of the files start to show its limits, and it's time to run the Dolphin debugger to find what is actually accessing the .so file when it is loaded in memory. First, I paused the code execution while it was displaying a skit and dumped the contents of the RAM. By locating the "TSS\0" string, I found out that the .so file was loaded at offset 0x816D8394 when executing the skit. I proceeded to modify the PowerPC interpreter in the Dolphin emulator to dump the CPU state in JSON at each memory read or write in the zone containing the .so file, and ran the skit once more to get a full dump of what code is actually accessing our file.

First, there seems to be some copying going on : the same instruction is writing data in the zone from top to bottom, starting at 0x816E0393 down to 0x816D8394. Classic memcpy, nothing to see here. After that, the four first bytes are read by an instruction at 0x80071E0C. Let's fire IDA to see what this is about:

.text2:80071E0C                 lwz     %r3, 0(%r21)
.text2:80071E10                 addis   %r0, %r3, -0x5453
.text2:80071E14                 cmplwi  %r0, 0x5300
.text2:80071E18                 beq     loc_80071E40

If you are not familiar with PowerPC assembly, what this does line by line is loading a word (32 bytes) at the address contained in r21, then add -0x54530000 to it, and compare it to 0x5300. In other words, it compares the first four bytes of the file to 0x54535300, which is "TSS\0", the four characters code which describe the file type. The rest of the code in this function is very large, let's not waste time and go to the next memory access to find an interesting one.

Some fields in the header seems to be read : offsets 0x4, 0xC, 0x14, 0x18, 0x1C, 0x8, 0x10, and then a lot of repeated accesses from code at address 0x80091DBC on always different offsets (0x7D40, 0x7D48, then 0x742C, etc.). Let's look at the code control flow there:

An experienced eye may directly recognize a switch statement here: loads of code without a visible predecessor, all leading to the same exit. I'd even go further and assume that is the main loop of a script interpreter. That would make of the .so file a Script Object file, containing compiled bytecode. Sounds consistent. If we look more precisely at the code 0x80091DBC which is reading the bytecode in memory, we can see that it is used to choose where to jump in the switch. In other words, it is the dispatch code of the bytecode interpretation loop, reading an opcode and dispatching it to handling code. From there, we can get nice informations: if it loads the opcode from memory then we can find where is the "current instruction" pointer, aka. PC (program counter). Let's look for that! This is the interesting part of the code:

lwz     %r0, 0xC(%r15)
lwz     %r4, 4(%r15)
mulli   %r0, %r0, 0x1420
add     %r5, %r15, %r0
lwz     %r3, 0x142C(%r5)
lwzx    %r17, %r4, %r3  # Read opcode

The last instruction loads a word indexed from memory. This means it loads the word at address r4 + r3. Looking at the memory dump we did with Dolphin, we can see the value of those two registers: 'r3':'00007D40', 'r4':'816D83B4'. So r4 is the address of the bytecode file (0x816D8394) + 0x20, which we can assume to be the address of the first opcode in the file, after the bytecode header. r3 is the PC, which varies while we are executing the code. They are both stored in some sort of interpreter state, whose address is stored in r15. In this state is the code base address, at offset 0x4 (second instruction of the listing), and some sort of table index at offset 0xC (loaded in the first instruction of the listing, then multiplied by a constant, and used as an index). This index is used to find the current PC. From that, we can assume that there can be multiple PCs stored at the same time, depending on the value of r15[0xC]. Hm...

Let's increase the usefulness of our memory dump by also dumping memory accesses to the whole interpreter state. After dumping all of that, we have log files containing 188MB of JSON with the CPU state at each access. In the next part of this article, I'll explain how to make this dump useful and readable by filtering it a little bit, and we'll start analyzing the 20 instructions of this bytecode 🙂

For impatient people, the final result of this reverse engineering work is a completely rewritten version of the bytecode interpreter, which can be found on my Bitbucket : cscript-interpreter. This is able to execute skit scripts quite well, even if there is still a bit of reverse engineering to do on the syscalls part.

2011
06.07

As in the other binary l33tness problems, only a single file was provided in the problem description:

b300_b258110ad2d6100c4b8: gzip compressed data

Decompressing this gives us a tar archive containing these files:

./0/
./0/heap-dump-tm1306902723-pid12959.hprof
./0/classes.dex
./1/
./1/1306902613084.jpgs
./1/1306903692478.jpgs
./2/
./2/1306902613084.jpgs
./2/1306903692478.jpgs

The binary is classes.dex, which is bytecode for the Dalvik virtual machine found on Android devices. The hprof file is a heap profiler output file which contains the state of the program heap at some point during the execution. The .jpgs files seems to contain random data at first, which leaded us to think it was encrypted data we needed to decrypt.

But first, let's decompile the bytecode. We first used dex2jar to get a classes.jar file, which we unzipped to get .class Java bytecode files. Then we used JAD to decompile the Java bytecode. It's not a perfect tool (a lot of things are not handled, for example exception handling is kind of crappy in the decompiled output) but it did the job quite well. The code was obfuscated: all classes, method and fields names were transformed to strings like "a", "b", "ab", "g", ...

We first tried to find where the .jpgs files were created in the code. Grepping the code gives us three matching classes: as.class, a Runnable instance which is probably the main thread code, i.class, which seems to take pictures from the Android device camera and saving them as JPEG, and r.class which is a FilenameFilter instance filtering files ending with .jpgs. But reading all the code to find where the encryption is done was a bit too tedious, so we decided to grep for another thing: Java standard encryption library. Grepping "java.security" returns us a single class: g.class, which seems to contain methods to generate random bytes, to compute the SHA1 hash of a string or to XOR encrypt/decrypt a string. Interesting.

Reading the code in this file gives us a lot of informations about the encryption method. This is simply a XOR cipher using the first 8 bytes of SHA1(password) as the key. Now we just need to find the key in the heap profiler dump we got in the TAR archive. The .hprof file first needs to be converted to the standard (non Android) hprof format using the hprof-conf tool found in the Android SDK. Then, using the Eclipse Memory Analyzer we need to find the "g" class instance. Using OQL, a SQL like used to query memory dumps, this does what we need:

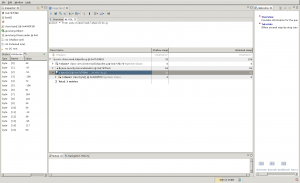
select * from com.closecrowd.lokpixlite.g
Using Eclipse MAT to find the b300 key

Using Eclipse MAT to find the b300 key

Now we just need a simple tool to decrypt the images. Behold!

#! /usr/bin/env python

import sys

KEY = (44, -47, -51, -106, 72, -106, 61, 104)

def decrypt(infile, outfile):
    intext = infile.read()
    outbytes = []
    key_index = 0
    for byte in intext:
        key_byte = KEY[key_index] % 256 # wrap to 0-255
        outbytes.append(byte ^ key_byte)
        key_index = (key_index + 1) % len(KEY)
    outfile.write(bytes(outbytes))

if __name__ == '__main__':
    for filename in sys.argv[1:]:
        infile = open(filename, 'rb')
        outfile = open(filename + '.jpg', 'wb')
        decrypt(infile, outfile)

Let's launch this on the "1" directory images:

$ ./decrypt.py *.jpgs
$ file *.jpg
1306902613084.jpgs.jpg: data
1306903692478.jpgs.jpg: data
$ xxd -l 64 1306902613084.jpgs.jpg 
0000000: 1dd1 c716 4f11 9c20 fdc8 0f64 619c d87d  ....O.. ...da..}
0000010: ffd8 ffe0 0010 4a46 4946 0001 0100 0001  ......JFIF......
0000020: 0001 0000 ffdb 0043 0010 0b0c 0e0c 0a10  .......C........
0000030: 0e0d 0e12 1110 1318 281a 1816 1618 3123  ........(.....1#

Woops. It looks like the JFIF marker is not at the correct offset. Looking at a JPEG picture, we see that it should be at 0x6, but it is instead at 0x16. Let's see what happens if we assume that the first 0x10 bytes are junk:

$ diff -u decrypt.py.old decrypt.py
--- decrypt.py.old      2011-06-07 07:26:45.603332762 +0200
+++ decrypt.py  2011-06-07 07:26:10.253333216 +0200
@@ -5,6 +5,7 @@
 KEY = (44, -47, -51, -106, 72, -106, 61, 104)
 
 def decrypt(infile, outfile):
+    infile.read(0x10)
     intext = infile.read()
     outbytes = []
     key_index = 0
$ ./decrypt.py *.jpgs
$ file *.jpg
1306902613084.jpgs.jpg: JPEG image data, JFIF standard 1.01
1306903692478.jpgs.jpg: JPEG image data, JFIF standard 1.01
$ md5sum *.jpg
0527c046512de51504790d03f00bda1c  1306902613084.jpgs.jpg
0527c046512de51504790d03f00bda1c  1306903692478.jpgs.jpg

Success! Here is the image duplicated in the "1" directory:

Thumbnail in b300

Looks like a thumbnail... well, let's look into the "2" directory. Again, two images with the same md5sum. Let's open one:

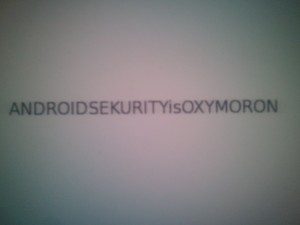
Image found in b300

And this is the key for b300: "ANDROIDSEKURITYisOXYMORON". IMHO this was a really easy problem for 300 points, as long as you know Java and its ecosystem a bit (and I think even without knowing anything about DEX files, JAD, MAT, etc. this could easily be done in an hour or two with enough Googling...).

EDIT: @Kachakil "write-up" -- cheater 😛

2011
06.06

gb100 took a lot of time to pwn for us as we ran out of ideas really fast and it was mostly guessing. Anyway, this is a small writeup about this really simple problem from the DEFCON 19 CTF.

The description of this problem contained only a host:port which we had to connect to. For the first 4 to 6 hours of the contest the server simply closed any incoming connection on the specified port, which caused us to try a lot of strange protocols, only to find out 4 hours later that the problem was fixed and was simply an HTTP server.

On every request, the server replied a “HTTP/1.1 408 Too Slow” error code, followed by some fixed Date and Last-Modified headers which turned out to be useless. The solution to that problem was to connect to the server using the SPDY protocol from Google, which is implemented in Google Chrome. You can force Chrome to use SPDY to connect to a website by launching it with the “–use-spdy=no-ssl” flag on the command line. After this is done, the server simply returns a text/plain content with “you are speedy enough, but not good enough”.

After a lot of time spent trying to fuzz SPDY headers and racing to be the first to connect to the server after each of its apparently scheduled downtime, we discovered that requesting /cgi-bin/ did not display the string but an HTTP 404 error, which was really odd. We then tried to guess what could be in this /cgi-bin/ directory: printenv, phpmyadmin, etc. and found a /cgi-bin/phf binary, which is mostly known to be the most vulnerable CGI script in the universe. We were able to launch commands on the web server, and a “ls” showed that a “key” file was present in $PWD. The query string was filtered and denied the command launch if the string “key” was found in the command line, but doing “cat *” was fine and gave us the key for this problem.

Stay tuned for a b300 writeup soon (today or tomorrow depending on my schedule) 🙂

2011
04.25

Comme vous avez peut-être pu le remarquer, je n’ai pas du tout posté d’articles ici pendant le mois dernier. Raison simple : j’étais principalement overbooké par l’organisation de la finale de Prologin, qui s’est déroulée du vendredi 22 au lundi 25 avril. Pour ceux qui ne le savent pas, Prologin est le concours national d’informatique pour les moins de 20 ans, et je suis secrétaire et administrateur système principal de l’association qui organise ce concours.

Pendant la finale du concours, 100 candidats doivent programmer une intelligence artificielle pour un jeu dont les règles changent tous les ans et sont rédigés par une petite équipe de gens motivés de l’association. Ils ont pour cela 36h, qu’ils passent dans les locaux de l’EPITA au Kremlin-Bicêtre à programmer, mais également à s’amuser un peu grâce aux différentes animations proposées par les organisateurs du concours (tournois de jeux, bataille d’eau, château gonflable, piscine à mousse, etc.). Côté administration système, il y a donc le problème de fournir à 100 candidats et (au moins) 10 organisateurs un système fonctionnant correctement et pouvant être déployé rapidement. L’autre problématique est de fournir un système permettant aux candidats de lancer des matches entre les intelligences artificielles qu’ils ont programmé, et permettant aux organisateurs de lancer des tournois contenant des milliers de matches de manière rapide.

Système utilisé par les candidats

Afin de répondre à nos contraintes de déploiement rapide, nous avons utilisé une solution à base de boot en PXE + disque système monté en NFS3 sur un serveur central dupliqué (nfsroot0 et nfsroot1). Ces deux serveurs utilisent DRBD en mode actif-actif afin de répliquer en temps réel les données modifiées d’un côté sur l’autre serveur. Pour profiter de cette fonctionnalité, il a également fallu utiliser un système de fichiers gérant l’écriture simultanée depuis plusieurs machines. Les principaux compétiteurs de ce côté là étaient OCFS2 et GFS, nous avons choisi le premier car il semblait plus simple à configurer et à administrer pour des néophytes de ce genre de technologies. La moitié des machines des candidats utilise nfsroot0 et l’autre moitié utilise nfsroot1 afin de distribuer la charge assez intense que supportent ces deux serveurs. Cette distribution est faite à base de round-robin DNS très classique.

La même chose a été mise en place pour /home, contenant les dossiers personnels de tous les candidats, et /srv/stechec, qui est utilisé pour stocker les intelligences artificielles et logs de matches qui servent au concours. Ces deux points de montage NFS sont tous deux sur nfshome0 et nfshome1, dupliqués de la même manière que pour / (DRBD + OCFS2).

Pour gérer tout ce qui est PXE, DHCP et DNS, nous avons utilisé dnsmasq, solution tout en un qui fait tout ce qu’il faut à partir de /etc/ethers et /etc/hosts. Même s’il a crashé plusieurs fois lors du reboot de 120 machines simultanément, nous n’avons globalement pas à nous plaindre de cette brique qui a fait tout ce qu’il fallait.

Enfin, tout tourne sur du Archlinux. Choix totalement subjectif et surement assez mauvais sur le long terme (c’est loin d’être un système stable comme Debian), mais on migrera ce qu’il faut quand ça sera nécessaire.

Distribution du lancement de matches

Lorsque les candidats programment leur intelligence artificielle, ils ont à leur disposition un intranet (programmé avec Django) leur permettant d’uploader leur code afin de le faire concourir. Lorsque le code est uploadé, il est automatiquement compilé, puis peut être utilisé pour lancer des matches. Lorsqu’un match est lancé via l’intranet, les logs des IA ainsi qu’un replay du match peuvent être téléchargés dès sa complétion.

Afin de distribuer les compilations des IA et le lancement des matches, j’ai programmé durant les semaines dernières deux programmes : un worker qui est lancé sur toutes les machines des candidats, et un master qui tourne sur nfsroot0 et qui sert à dispatcher les matches sur les différents workers. Ces deux programmes sont codés en Python avec Gevent (bibliothèque de programmation asynchrone), et communiquent via du XML-RPC dans les deux sens afin de s’échanger des messages. Du failover automatique est mis en place pour gérer le cas de la perte d’une machine, et le dispatching se fait de manière à ne pas surcharger une seule machine : les tâches sont distribuées équitablement sur les 120 machines.

Lors du lancement d’un match, l’intranet stocke donc dans une base de données PostgreSQL toutes les informations nécessaires, puis le master (qui poll la base de données toutes les 2 secondes) va redispatcher vers un worker, qui va s’occuper du lancement du match et renvoyer les résultats au master, qui va les inscrire dans la base de données.

Le lancement d’un match côté worker

Pour lancer des matches entre intelligences artificielles, Prologin utilise un programme codé vers 2005 par des membres de l’association, nommé Stechec. Il s’agit d’un serveur permettant de charger dynamiquement une bibliothèque dynamique contenant les règles d’un jeu, et une bibliothèque dynamique représentant l’intelligence artificielle jouant à ce jeu.

Stechec est codé en C++ et est totalement libre (sous licence GPLv2). Les sources de la version utilisée pour la finale de Prologin 2011 seront bientôt mises sur Github, mais la version précédente peut être trouvée sur Bitbucket.

Conclusion

Au final, tout a bien marché. Quelques pannes ont évidemment eu lieu (souvent à cause de problèmes de configuration réseau), mais globalement ce fut une bonne finale du point de vue système, surtout en prenant en compte que tout a été refait cette année. Ce fut par contre très crevant (une seule nuit de vendredi matin à lundi matin…) et je vais prendre un peu de temps à me remettre en forme… oh, wait, j’ai une soutenance demain :'( .

2011
03.27

Eri HaKawai is a new exploit for PAL Wiis, which work for all currently released System Menu versions (<= 4.3). It works by using a bug in the savegame loading code of Tales of Symphonia: Dawn of the New World, the sequel to the Gamecube game Tales of Symphonia.

I'm releasing it in a source format (no binary data.bin) under the GPLv2. You'll need a Broadway cross-compilation toolchain, as well as a checkout of Segher's Wii Git repository. Do whatever you want with it (as long as it is allowed by the license, of course!), I'm just too lazy to distribute binaries.

Download Eri HaKawai v0.1

How to use (directly copied from the README file in the tarball):

Usage:
 - Compile it with ./make.sh
 - Copy the "private" folder to the root of your SD card.
 - Put the homebrew you want to load on the root of your SD card, named
   "boot.elf"
 - Start the game and load the first save
 - Press the PLUS button to enter the game menu
 - Scroll to the STATUS button and press A
 - Scroll to the monster named "Eri HaKawai" and press A
 - The boot.elf file should be loaded from your SD card.

That's it! Have fun with this new exploit, and don't forget to play the great game that Tales of Symphonia: Dawn of the New World is :-) .

2011
03.25

Le 25 décembre dernier, j'ai eu la bonne surprise de me faire offrir une Wii (la version « anniversaire des 25 ans de Mario ») par quelqu'un de ma famille. Très vite, étant développeur et curieux, je me suis intéressé à comment fonctionne cette console et comment, potentiellement, exécuter du code dessus. Cela a notamment mené à ma série d'article sur le format des DVD de jeux de Wii, mais également à une tonne de recherche et de reverse engineering de mon côté pour comprendre le fonctionnement du jeu en question.

Cependant, même si j'en ai appris beaucoup, cela ne me permettait pas d'exécuter mon propre code sur la console. C'est plutôt triste, étant donné que j'aimerais bien faire plus que lire des descriptions du hardware : manipuler, c'est priceless. Pour exécuter des binaires non officiels sur une plateforme fermée, il faut passer par une méthode que l'on appelle le jailbreak. Cela passe en général par l'exploitation d'une faille dans un logiciel sur la plateforme (dans le cas d'une console, un jeu par exemple) qui permet d'exécuter du code, puis de rooter la plateforme en question. Sur l'iPhone, il y a par exemple eu la faille du lecteur PDF qui permettait de jailbreaker le téléphone directement en accédant à une page web. Sur la Wii, l'exploit Bannerbomb permettait l'an dernier de jailbreaker une Wii en lui faisant lire une image malformée. Bref, les exemples ne manquent pas.

La Wii fait tourner un firmware, composé d'un OS et d'une interface graphique permettant de lancer un jeu, de changer les paramètres de la console ou de copier les sauvegardes sur une carte SD. Ce firmware est disponible dans de nombreuses versions et est régulièrement updaté. La dernière version, fournie avec ma Wii, est la version 4.3. Les seules méthodes de jailbreak fonctionnant sur cette version de la console passent par des failles dans des jeux, comme par exemple Lego Indiana Jones ou Yu-Gi-Oh Wheelie Breaker. Le problème est que ces jeux, une fois prouvés vulnérables, ne sont plus vendus dans le commerce et se revendent à prix très élevé sur internet (étant donné que les gens les achètent uniquement pour jailbreaker et le revendent juste après). Je n'ai aucun de ces jeux, et après les avoir cherché pendant quelques temps dans les magasins près de chez moi, je me suis rendu compte qu'il n'y avait surement aucune chance que je les trouve à un prix peu élevé.

Je n'ai en effet que 4 jeux de Wii chez moi : Madworld, New Super Mario Bros Wii, Final Fantasy Crystal Chronicles: Echoes of Time et Tales of Symphonia: Dawn of the New World. C'est ce dernier jeu que j'ai en grande partie exploré lors de mes tentatives de mieux comprendre la console et son fonctionnement. Parmi ces tentatives, j'ai passé un certain temps à essayer de comprendre le format des sauvegardes du jeu. À cette époque, je n'avais aucune envie de jailbreaker ma Wii (pas besoin pour le moment, les jeux étaient chers, etc.) et je faisais uniquement ça dans le but de documenter le format, afin de pourquoi pas modifier les sauvegardes, ce qui me permettrait de tester plein de choses le moment venu.

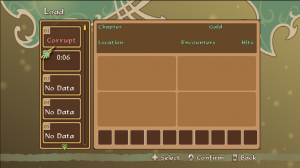
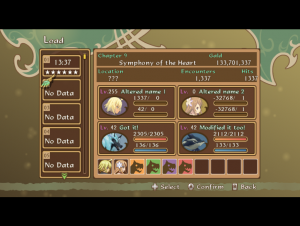
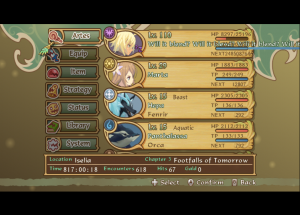
Les sauvegardes du jeu sont en gros composées de deux parties : une header d'une taille très réduite, puis le corps de la sauvegarde, pesant environ 200K. Le header contient uniquement les données à afficher dans la liste des sauvegardes (temps de jeu, personnages dans l'équipe, endroit dans le jeu où la sauvegarde a été faite, etc.). Le corps de la sauvegarde, lui, contient tout : il duplique les données du header, mais contient également des informations plus détaillées, notamment sur les personnages (pas besoin d'avoir leurs statistiques complètes si c'est juste pour la liste des sauvegardes, par exemple). Je me suis donc lancé dans des modifications, pour voir l'effet que cela a sur le jeu. J'ai changé le nom d'un personnage dans le header, ce qui m'a donné ceci :

Sauvegarde corrompue

Échec n°1 (je vais les compter, just for fun). J'ai donc cherché ce qui permettant de détecter la corruption des données, et après analyse de différentes sauvegardes correctes que j'ai fait avec le jeu, j'en ai déduit que les 8 premiers octets du header servaient de checksum. Cependant, il me restait à trouver la méthode par laquelle était faite le checksum. C'est beaucoup plus difficile, étant donné qu'il y a plus de 20 mégaoctets de code compilé dans le jeu. J'ai donc modifié les sources de l'interpréteur PowerPC de l'émulateur Dolphin afin de m'indiquer lorsqu'une lecture était faite dans ces 8 octets de checksum, pour savoir quand ils étaient effectivement vérifiés. Grâce à cela, j'ai pu arriver sur le code de la fonction qui vérifie ce checksum, et en extraire l'algorithme. Beaucoup plus simple que je le pensais : les 4 premiers octets de checksum servent à vérifier le header, et sont le résultat de la somme des 162 entiers de 32 bits suivant le checksum. Les 4 derniers octets de checksum servent à vérifier l'ensemble de la sauvegarde, et sont eux le résultat de la somme des 51908 entiers de 32 bits suivant le checksum. J'ai codé un petit outil minimaliste calculant ce checksum, et j'ai ainsi pu charger des sauvegardes modifiées. Cela m'a pris 2 jours.

Première modification de sauvegarde Deuxième modification de sauvegarde

Ensuite, j'ai essayé de comprendre l'intérêt des différentes valeurs contenues dans le fichier binaire représentant une sauvegarde. Certains étaient évidents : tout ce qui est affiché à l'écran, par exemple, est simple à interpréter. D'autres me sont encore inconnus. Ce n'est cependant pas vraiment l'objectif de l'article de parler de cela. Quelque chose a attiré mon attention pendant cette exploration du fichier : les noms des personnages semblent avoir une taille fixe réservée, mais ils sont en fait copiés en mémoire jusqu'au premier caractère nul. Ce n'est à mon avis pas une erreur idiote dans le code de chargement (un strcpy sans vérifier la taille, par exemple) mais plutôt le résultat d'un chargement écrit comme ceci :

struct personnage
{
    char name[32];
    int level;
    int hp;
    int mp;
    // ...
};

// Code de chargement
fread(&perso, 1, sizeof (struct personnage), fp);

Du coup, lors de la manipulation du nom du personnage, on peut potentiellement utiliser une chaîne qui fait plus de 32 caractères alors que le code semble indiquer que sa taille maximale est de 32. Mon esprit de hacker s'allumant, j'ai donc tenté d'y mettre une chaîne contenant un très grand nombre de A (environ 1000). J'avais donc un personnage dont le nom était très grand. Lorsque j'ai essayé d’accéder à l'écran de statut du personnage j'ai eu le droit à ceci venant de mon émulateur :

Unknown pointer 0x41414140

Cela pouvait vouloir dire 2 choses :

  • L'émulateur a essayé de lire ou écrire à cette adresse et a échoué. Cela pourrait arriver « normalement » si des pointeurs étaient sauvegardés en dur dans la sauvegarde (vu qu'on est dans un environnement contrôlé, sans ASLR et avec du code toujours chargé à la même adresse, pourquoi pas !). Cependant, après inspection d'une sauvegarde non altérée, rien qui ne ressemble à un pointeur valide est stocké dans la zone contenant uniquement des A. La seule solution pour qu'une lecture ou écriture ait été faite à cette adresse serait que le nom à rallonge ait écrasé un pointeur, ce qui nous permet de faire des trucs drôles.
  • L'émulateur a tenté de jumper à cette adresse et a échoué. C'est encore pire ! Cela veut dire que j'aurais écrasé avec mes A un pointeur sur fonction ou une adresse de retour stockée dans la pile. L'exploitation serait même plus simple que dans le premier cas.

Après modification de l'émulateur pour clarifier le message, il se trouve que l'on est dans le deuxième cas : j'ai écrasé l'adresse de retour de la fonction dans la pile avec mes A. À coup de modifications successives de la sauvegarde et de tests, j'ai pu trouver exactement l'endroit dans la chaîne qui écrasait l'adresse de retour : il s'agit de l'offset 0x144. En mettant à cet offset une adresse valide, l'émulateur y saute et exécute le code.

Il m'a donc fallu du code à exécuter. J'ai tout d'abord fait très simple et assemblé deux instructions qui allaient lire à une adresse connue (0x13371337) un entier en mémoire, ce qui faisait évidemment une erreur de lecture (qui me serait reportée par l'émulateur). J'ai ensuite placé cela à un endroit dans la sauvegarde qui semblait ne contenir que des 0. J'ai réalisé un dump de la mémoire de la console après le chargement de la sauvegarde pour trouver exactement l'adresse à laquelle jumper, et je l'ai mise à l'offset 0x144 du nom. Success !

Je pouvais donc à ce point exécuter du code sur la console. Sauf que placer du code directement dans la sauvegarde, en plus d'être archaïque, ne permet pas de mettre beaucoup de code (40-50K au grand maximum), et est tout sauf pratique. J'ai donc largement profité du fait que les gens avant moi ont déjà développé des payloads permettant de faire cela. Le dépot savezelda de Segher contient notamment un dossier loader avec du code dédié à charger un binaire ELF depuis la carte SD. J'ai donc recompilé ce code en faisant en sorte qu'il soit bien linké pour être lancé à l'adresse où il serait en mémoire. Un bug inexplicable de GCC fait que le code ne linke pas en -Os, ce qui m'a fait perdre une bonne douzaine d'heures (qui se douterait que l'utilisation de -Os causerait des problèmes au link liés à l'EABI ?). Après un peu de boulot, j'ai donc réussi à exécuter un homebrew basique sur Dolphin, l'émulateur Wii :

Ensemble de Mandelbrot affiché par une Wii

Vient ensuite l'étape fatidique : l'exécution sur du vrai hardware. Échec n°2 : le jeu freeze au lieu de charger le payload. J'ai changé le code du loader par une simple instruction allumant la lumière du lecteur CD de la Wii, rien ne fonctionne. Le 20 janvier, j'arrête de travailler sur cet exploit, en me disant qu'il venait très certainement d'un bug dans l'émulateur. Je me suis concentré sur le reverse engineering de l'interpréteur de script du jeu.

Cependant, il y a une semaine, je me suis souvenu de ce début de faille, et j'ai décidé d'investiguer le problème, ma motivation étant revenue. Je me suis rendu compte que le stack overflow me permettant d'écraser l'adresse de retour dans la stack est fait au tout début d'une grosse fonction, et le jump vers mon code est fait à la fin de cette grosse fonction. J'ai ainsi émis l'hypothèse que j'écrasais également des variables locales, faisant planter le jeu.

J'ai ainsi changé la valeur avec laquelle j'écrasais la stack, en passant de A (0x61) à simplement 0x01. Et là, magie ! Mon code PowerPC disait « Que la lumière soit », et la lumière fut :

La lumière fut

Joie. J'ai ensuite repris le loader afin de charger un homebrew (un simple pong en mode texte) depuis ma carte SD. J'ai fait une petite vidéo de l'exploit (mauvaise qualité, iPhone, toussa). Cependant, les 3/4 des programmes que je tentais de lancer plantaient aléatoirement, notamment parmi eux le Hackmii Installer, merveilleux outil permettant d'installer le Homebrew Channel qui permet définitivement de lancer des homebrews sans avoir besoin d'exploit.

Hier, je me suis enfin rendu compte du problème : j'exécutais le code sans avoir cleanup le contexte vidéo avant cela. M'inspirant des autres exploits de jeux, j'ai donc cherché dans le code du jeu l'offset de la fonction video_stop qui fait partie du SDK de Nintendo. Avec ça, j'ai pu lancer le Hackmii Installer et définitivement jailbreaker ma Wii.

Voilà ce que j'appelle jailbreaker une console comme un homme :-)

Pour la suite des événements, selon comment mes partiels se dérouleront la semaine prochaine, j'essaierai de faire une release le plus rapidement possible d'un truc propre et qui marche sur toutes les Wii PAL (je n'ai rien pour tester sur une Wii NTSC mais ça devrait être la même chose à quelques offsets près). Je tiens à remercier tous les gens de #wiidev @ efnet qui m'ont bien aidé à debugger quelques conneries, malgré ma grande newbiness, mais également tous les gens qui ont release des outils libres m'ayant permis de gagner des semaines (notamment segher et la Team Twiizers). Enfin, merci aux gens du LSE (Laboratoire Système de l'EPITA) qui ont supporté mes monologues, mes « YES! » de joie, et qui m'ont apporté une expertise de l'architecture PowerPC que je n'avais pas (ainsi que beaucoup de coca).